Last Updated 7th September, 2011
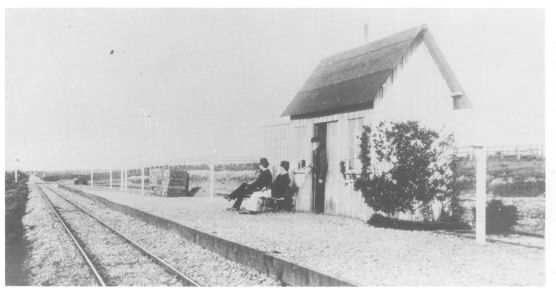
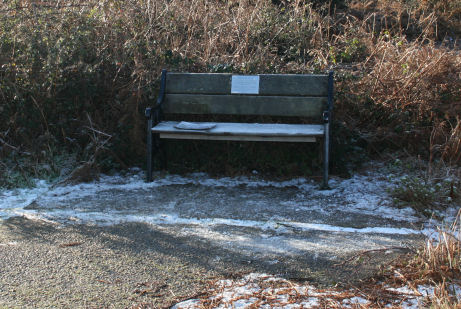
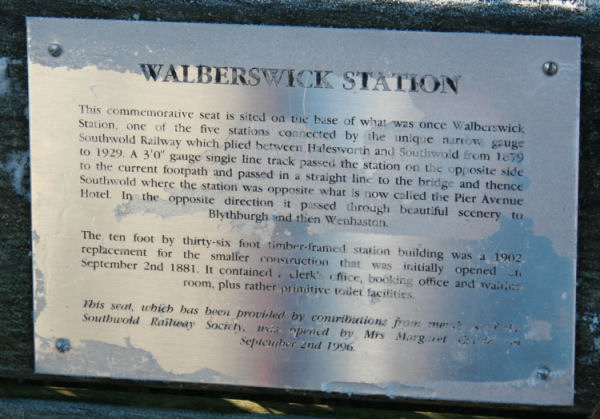
Not built until after the line had been in operation for 6 years, the station is ½ mile from the centre of the village. The neat little station building was replaced in 1902 with a larger edifice. Today a seat and plaque mark the station site.
Sitting on a brick built raised area, the wooden edged concrete platform sits at a low level with the station building let in to it. There are various adornments added when we are running. The small planted area aims to recreate the vegetation found close to the original station.
The arrangement of sidings at Walberswick altered little over the years. Using a map from 1904 as a guide I've used AristoCraft brass points and 12 inch straights to construct the sidings with Peco G45 track continuing the main line along the platform face.
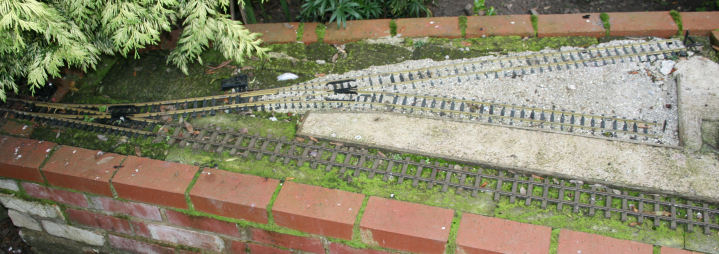
You can see that I've made an attempt to ballast the sidings. I obtained some chicken grit from a local supplier, but strugged to remove enough of the crushed shell to make things look right.
Having dug and shuttered the site, my usual 4 inch footing was poured followed by 6 courses of bricks reclaimed at the rear, new at the front, topped by engineerings taking the top of the wall to my main track level. I've left a number of gaps between bricks on the first course to drain the whole area. Once filled with crushed brick rubble, the top was leveled and aerated concrete blocks laid on their side to provide a flat surface overall. Track laying then commenced, joining the existing line from the bridge. Each point and each track section had the outside of a sleeper drilled through and the panel was then fixed down by nailing direct in to the aerated block. The platform area was outlined by 8mm by 12mm hardwood strip, pre-drilled and nailed to the surface, this area was then filled to within 2mm of the top of the wood with a render mix and allowed to dry. In order to seat the station in, rather than on, the platform the building was placed on this surface clad in cling film and the top surface of the platform laid, this being a concrete mix using aquarium gravel as the aggregate which I had hoped would show better than it has. Once the surface was green, the station was removed and the platform left to harden.
The planting pocket to the right of the station was at first only a few inches deep and the plants did not thrive to say the least! Having cleared the dead plants and soil I excavated more of the rubble, then filled partially with soil, then a soil / compost mix and re-planted, fingers crossed this time but things are looking much healthier.

For the green fingered amongst you, the miniature conifer is a , the small bushes to the rear are hebe, the spreading foliage to either side is frankenia Leavis, the grassy looking ground cover front right is .
The wooden station building, with outside urinal, is made mainly from plywood. The roof uses corrugated plastic and has two solar cells let in to power the interior LED lamps.